Registering components
Registering React components is what makes them available in the Makeswift builder. The
ReactRuntime.registerComponent
function accepts a type
to identify the component, a label
to
label it in the Makeswift builder, and props
to define the controls.
import { ReactRuntime } from '@makeswift/runtime/react'
AnchorBreaking changes
AnchorType
When building visually in the Makeswift builder we save your component's data according to the
registered component's type
and props
schema. What this means is that if the type
changes, the
component won't be recognized and you will see a "Component not found" error.
AnchorProps
If the props
change in an incompatible way, this might cause runtime errors since the data that
Makeswift will provide your component might not match what your component expects anymore.
We're actively working on building migration tools so that you can migrate component data. For now,
it's a bit of a manual process where a component can be registered with a new type
and then be
visually replaced in the Makeswift builder. Once all instances of the old component have been
replaced, the old component can be removed.
AnchorLocal development
When changing files that call registerComponent
you've got to do a full refresh so that the
changes can be registered. This is not necessary when changing the component source—it's only
necessary when changing a file that calls registerComponent
.
AnchorOrganizing components
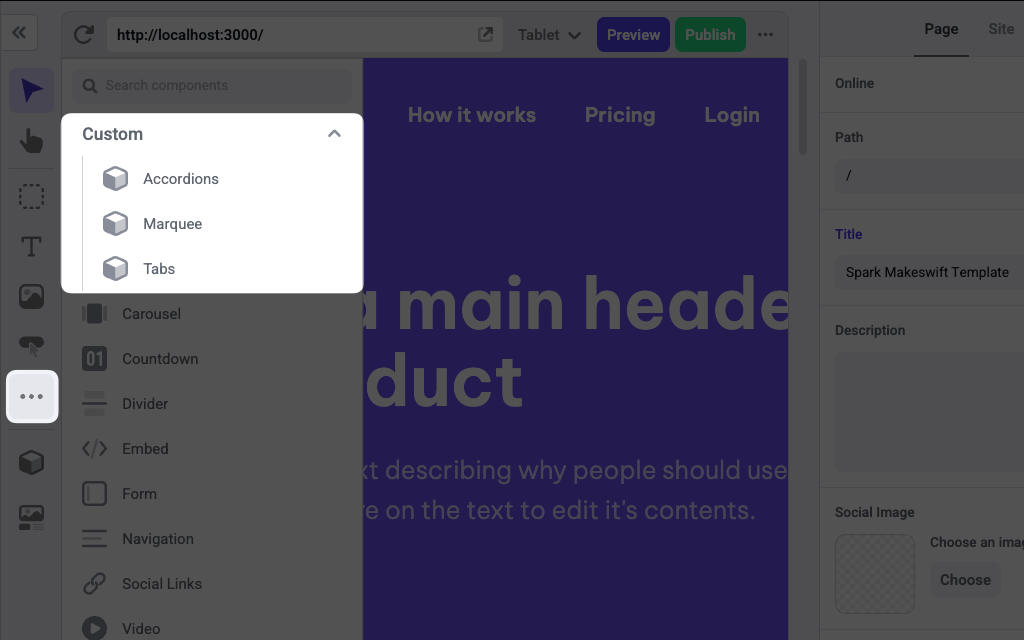
As you register more components, finding a specific component in the builder can become challenging. We've included some features to make finding your components simpler: sections, icons, and search.
AnchorSections
Sections are a way to group components in the builder, creating a visual
hierarchy for organizing your components. To create a section hierarchy, simply
incorporate forward slashes (/
) in the label
of your component when you
register it.
Let's say you have a Sphere
component that belongs in a section named
"Visuals". To organize this component, use the label 'Visuals/Sphere'
.
Similarly, if you have another Cube
component that belongs in the same
"Visuals" section, label it with 'Visuals/Cube'
. In the builder, these
components will now be grouped together under a collapsible section called
"Visuals". See the Examples section for details.
For even more organization, you can create multiple sections within the labels by separating them with slashes. This way, you can create a nested hierarchy to suit your needs and keep your components neatly organized.
AnchorIcons
For additional visual organization, you can optionally register each of your
components with an icon. Simply import ComponentIcon
from @makeswift/runtime
and select a value from this object as the component's icon
. The component
will now be displayed in the builder component tray with the icon of your
choosing. If you do not provide an icon, the default cube icon will be
displayed. See the Examples section for details.
These icons are currently accessible via ComponentIcon
:
AnchorSearch
You can search for individual components by label using the search bar at the top of the components tray. If you've used sections to organize your components, you can search for any part of the component's label, including the names of the sections it belongs to.
AnchorExamples
AnchorA simple box
In this example we register a Box
component. We provide the value 'box'
for type
which must
be unique and is how Makeswift knows to render the component. This value shouldn't change once the
component has been used in the Makeswift builder. We also provide label
, which will be shown in
the Makeswift builder. For the props
we use a Style
to control the
className
prop.
import { ReactRuntime } from '@makeswift/runtime/react'
import { Style } from '@makeswift/runtime/controls'
function Box({ className }) {
return <div className={className}>I'm a box!</div>
}
ReactRuntime.registerComponent(Box, {
type: 'box',
label: 'Box',
props: {
className: Style({ properties: Style.All }),
},
})
AnchorCreating sections
In this example, we register a Cube
and a Sphere
component under a "Visuals" section. In each
components' label
, use slashes to separate the section name and component name. In the Makeswift
builder, both components are shown under the same Visuals collapsible section:
import { ReactRuntime } from '@makeswift/runtime/react'
import { Style } from '@makeswift/runtime/controls'
function Cube({ className }) {
return <div className={className}>Cube!</div>
}
function Sphere({ className }) {
return <div className={className}>Sphere!</div>
}
ReactRuntime.registerComponent(Cube, {
type: 'cube',
label: 'Visuals/Cube',
props: {
className: Style({ properties: Style.All }),
},
})
ReactRuntime.registerComponent(Sphere, {
type: 'sphere',
label: 'Visuals/Sphere',
props: {
className: Style({ properties: Style.All }),
},
})
AnchorCustom Icon
In this example, we register an ImageGallery
component with a custom icon. We
import ComponentIcon
from @makeswift/runtime
and pass
ComponentIcon.Gallery
as the icon
for our component. In the builder
component tray, we can see our component with the selected icon.
import { ReactRuntime } from '@makeswift/runtime/react'
import { Style } from '@makeswift/runtime/controls'
import { ComponentIcon } from '@makeswift/runtime'
function ImageGallery({ className }) {
return <div className={className}>I'm an image gallery!</div>
}
ReactRuntime.registerComponent(Cube, {
type: 'image-galley',
label: 'ImageGallery',
icon: ComponentIcon.Gallery,
props: {
className: Style({ properties: Style.All }),
},
})
AnchorAPI
AnchorParameters
Parameter | Type | Required | Default | Description |
---|---|---|---|---|
type | string | yes | N/A | A unique identifier for the registered component. |
label | string | yes | N/A | The label shown in the Makeswift builder. |
props | { [key: propName]: ControlDefinition } | yes | N/A | Mapping from prop name to Makeswift control. |
Valid control values for the props
parameter are the following: